 I went to an event at Coastal Eduquilters
 http://www.eduquilters.org
in Satellite Beach, Florida in January 2013 and they handed everyone a Brown Bag with 2.5 inch x 45 inch fabric strips in it. The action was to: "Make a Quilt". This is how we did it. I did not choose the fabric colors but the fabric was very high quality cotton quilting fabric and I would never have chosen such bright colors but I was game to try anything and after putting it together I liked it and I liked the process of it. I have made small quilts but I think in reality this was my first ever quilt where I got instruction and support, made with other quilters in a very positive and uplifting way. I loved it and the bug of quilting sort of bit me making this quilt.
Supplies:
128 2.5"x45" strips of 8 different fabrics
12.5 Square Ruler
Sewing Machine and Quilting Supplies
1. Make 4 stratas (strip Pieced unit). A strata is made by sewing lengthwise 9 different strips together. Sew each strip together by sewing in a different direction each time you add a strip, this will insure a Flat strata, not curved. Must measure 18" x 45"

2. With the 12.5 Square, lay it on the strata, as shown above, cut two squares out on a diagonal, centering each and you will get a diagonal square as shown (below)


3. Now separate the seam between strip 4 and 5, of the leftover inside pieces as shown (above), turn these pieces upside down and sew strips 1 and 9 together to form another 12.5 square. Square it off with ruler and cutter.
4. Repeat this strata process 3 more times for a total of 12 blocks. Take the 12 blocks and arrange as desired
5. Take the extra pieces of sewn together strata and sort them by the way the diagonal strips go together. Sew them together to make long lengthwise borders. Extra strips can be cut in half lengthwise to make the inside border of 1.25 inches and they arrange the diagonal pieced strips around the inner border for the outer border. This way you use up all your material to get
the quilt top.
 |
| This is me arranging the 12 squares on a design wall |


 |
| Quilt top sewn together |
 |
| The Quilt after it was professionally quilted in a curlique pattern hanging on my cloths line |
 |
| You can see the Quilting in the Day Light |

 |
| Curlique |
 |
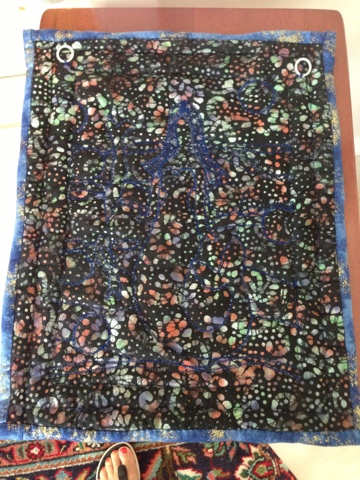
| Backing with solid Blue Binding |
 |
| Close Up of Backing I used a Red Quilting Thread |


My finished Crazy Brown Bag Quilt!
This project was a lot of fun. I was handed a bag of strips and this is what came out of it. I enjoyed just trying to make it work. In my wildest dreams I would never have picked out this fabric myself but it was fun using what was at hand to create something beautiful and interesting. This is the first time I had ever made something that I had professionally quilted. I had it quilted at "The Quilt Place" http://www.thequiltplace.com in Rockledge, Florida. This is a world class quilting store with floor to ceiling quilts, fabric, ideas, patterns, a classroom, and a quilt retreat facility nearby. I really enoyed making this so I thought I would document the process here. Someone told me they thought this was the ugliest quilt they had ever seen and I have to laugh because my experience of making it was such a joyful and positive thing that it just makes me happy.
Happy Quilting,
Melissa


