Tuesday, April 30, 2013

Seashell Strata Quilt - Using Stonehenge Fabric - Uses Jelly Roll 2.5 inchesx45inches - Fabric Strips

Finished Quilt

Seashell Strata Quilt 
Using 
Stonehenge Fabric 
 Jelly Roll 2.5"x 45" 40 Fabric Strips
I gave this Quilt to Emily because she is expecting a baby
and I am hoping she will use the quilt as a
 floor quilt this summer for the little one.
Emily loves the beach and likes things clean and simple. I thought she would like this and get a lot of use out it.

How I did it:
Quilt in Process 
pinned on an old vinyl tablecloth design wall


The Top sewed together

Supplies:
128 2.5"x45" strips of 8 different fabrics
12.5 Square Ruler
Sewing Machine and Quilting Supplies


1. Make 4 stratas (strip Pieced unit). A strata is made by sewing lengthwise 9 different strips together. Sew each strip together by sewing in a different direction each time you add a strip, this will insure a Flat strata, not curved. Must measure 18" x 45"


2. With the 12.5 Square, lay it on the strata, as shown above, cut two squares out on a diagonal, centering each and you will get a diagonal square as shown (below)


3. Now separate the seam between strip 4 and 5, of the leftover inside pieces as shown (above), turn these pieces upside down and sew strips 1 and 9 together to form another 12.5 square. Square it off with ruler and cutter.

4. Repeat this strata process 3 more times for a total of 12 blocks. Take the 12 blocks and arrange as desired


5. Take the extra pieces of sewn together state and sort them by the way the diagonal strips go together. Sew them together to make long lengthwise borders. Extra strips can be cut in half lengthwise to make the inside border of 1.25 inches and they arrange the diagonal pieced strips around the inner border for the outer border. This way you use up all your material to get the quilt top.
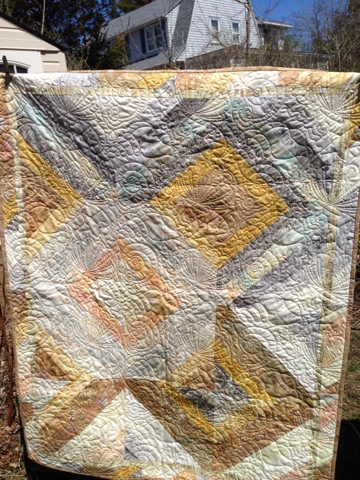
Note the 1.25 inch inner border
and the diagonal pieces outer borders


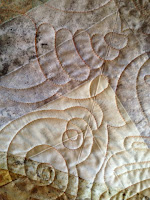
I had the quilt professionally quilted at The Quilt Place in Rockledge, FL. I also bought the fabric there too!I decided on a a sea shell motif quilting pattern and I used Stonehenge fabric for the Backing and Binding. I also used a variegated red, orange, and yellow thread for the Quilting. The Quilting came out wonderfully!

The effect is a strong beach motif on what looks like sand and stone. I imagined this being a quilt used on the floor for a baby and the idea is a day at the beach.


Quilt Top Measures 44" X 54" so its a good size
for a Babies floor quilt or for a small child's bed.


The Backing looks like Sand and 
with the Shell and 
Starfish Designs 
it really feels like the beach! I used a darker brown
binding fabric to frame the whole thing and I think it came out well. I think if you wanted to make this a King Size Quilt, you could use 4 of these panels sewn together or 4 jelly rolls. The effect would look more balanced in a larger quilt.  This was a good project for me to practice my skills and I also just fell in love with the Stonehenge Fabric and this was a design I had learned and wanted to try my hand at making on my own. I am happy with how it came out and I hope it gets years of love and use with the new baby.

Happy Quilting,
Melissa


Thursday, April 18, 2013

Crazy Psychedelic Brown Bag Strata Quilt - Photos and Instructions

I went to an event at Coastal Eduquilters 
http://www.eduquilters.org 
in Satellite Beach, Florida in January 2013 and they handed everyone a Brown Bag with 2.5 inch x 45 inch fabric strips in it. The action was to: "Make a Quilt". This is how we did it. I did not choose the fabric colors but the fabric was very high quality cotton quilting fabric and I would never have chosen such bright colors but I was game to try anything and after putting it together I liked it and I liked the process of it. I have made small quilts but I think in reality this was my first ever quilt where I got instruction and support, made with other quilters in a very positive and uplifting way. I loved it and the bug of quilting sort of bit me making this quilt. 


Supplies:
128 2.5"x45" strips of 8 different fabrics
12.5 Square Ruler
Sewing Machine and Quilting Supplies


1. Make 4 stratas (strip Pieced unit). A strata is made by sewing lengthwise 9 different strips together. Sew each strip together by sewing in a different direction each time you add a strip, this will insure a Flat strata, not curved. Must measure 18" x 45"


2. With the 12.5 Square, lay it on the strata, as shown above, cut two squares out on a diagonal, centering each and you will get a diagonal square as shown (below)


3. Now separate the seam between strip 4 and 5, of the leftover inside pieces as shown (above), turn these pieces upside down and sew strips 1 and 9 together to form another 12.5 square. Square it off with ruler and cutter.

4. Repeat this strata process 3 more times for a total of 12 blocks. Take the 12 blocks and arrange as desired

5. Take the extra pieces of sewn together strata and sort them by the way the diagonal strips go together. Sew them together to make long lengthwise borders. Extra strips can be cut in half lengthwise to make the inside border of 1.25 inches and they arrange the diagonal pieced strips around the inner border for the outer border. This way you use up all your material to get 
the quilt top.
This is me arranging the
12 squares on a design wall


Quilt top sewn together
The Quilt after it was professionally quilted in a
curlique pattern hanging on my cloths line
You can see the Quilting in the Day Light


Curlique
Close ups of the Quilting


Backing with solid Blue Binding


Close Up of Backing
 I used a Red Quilting Thread

Above: Two other quilt tops being done by friends at the same time. I am showing this so you can see the fun and variation you can have designing this Strata Quilt. If you sew 4 of them together, you have a nice Queen/King Quilt. The size of these are 44 inches x 54 inches which is the size of a large baby quilt or a small child's quilt. Makes an interesting wall hanging as well.


My finished Crazy Brown Bag Quilt!
This project was a lot of fun. I was handed a bag of strips and this is what came out of it. I enjoyed just trying to make it work. In my wildest dreams I would never have picked out this fabric myself but it was fun using what was at hand to create something beautiful and interesting. This is the first time I had ever made something that I had professionally quilted. I had it quilted at "The Quilt Place" http://www.thequiltplace.com in Rockledge, Florida. This is a world class quilting store with floor to ceiling quilts, fabric, ideas, patterns, a classroom, and a quilt retreat facility nearby. I really enoyed making this so I thought I would document the process here. Someone told me they thought this was the ugliest quilt they had ever seen and I have to laugh because my experience of making it was such a joyful and positive thing that it just makes me happy.

Happy Quilting,
Melissa


Monday, April 15, 2013

Medaille D'Or Scissors Find at a Florida Yard Sale - Appear to be very High End Scissors, Anybody know more?


I bought these scissors at a yard sale in Florida. The woman who was having the yard sale told me that she bought them in an estate sale recently nearby. I have tried and tried to find some information on this particular brand of French embroidery scissors and if anyone knows more, could you please email me.

From what I understand each one of these scissors were made by the widow of a famous French Scissors maker to commemorate his work and life. Apparently, only 200-250 of each pair were made. Each pair has a number on them. In the information I gleaned from a couple of websites (see below), these are pretty special scissors. They cut like a dream and are the best scissors I have ever had!


The larger Art Deco scissors are stamper 60 Medaille D'Or with a little crown above them and they are numbered 24. There is a stamp that says "tenna something" one side.... the smaller ones are stamped 76 inside the blades and have the crown and logo that says 69 Medaille D'Or on one side. The plain scissors are not stamped with anything but are in the leather case and I have to tell you, they cut incredibly so even tho they aren't stamped, it seems like the exact same workmanship. The rabbit scissors are stamped with a 3 but do not have the Medaille D'Or 69 Crown and stamp on them but are also in the Leather case stamped with the logo 69 Medaille D'Or  and Crown logo.


___________________________________________________

Rabbit Sculptural Embroidery Scissors (far right)

I found a pair of these for sale on line for $138.00 at http://www.unoallavolta.com/default.asp

Historical Forgings
These rabbit embroidery scissors were all forged in the early to mid 1900's. Created from matrices no longer in existence, these carbon steel forgings were discovered in unfinished ("brute de forge") condition. Forgings back then were created by several rapid poundings rather than one big "whack" as they are today, resulting in scissors that are far more graceful and delicate. Each pair has been polished and sharpened to perfection in the "monte au moirŽ" tradition. Completed one at a time, the blades are plated with chrome, the handles with pure gold. Each pair of rabbit embroiders scissers comes in a hand-sewn leather pouch. Fewer than 250 of each exist. The Rabbit scissors were popularized around 1950 and measure 4" in length.

______________________________________________________

I also found a sewing blog where a woman talks about getting a pair of the rabbit scissors: 
http://danitorres.typepad.com/peacockfeather/2005/12/lovely_scissors.html

Trapezoidal Art Deco Embroidery Scissors 

Century-Old Historical Forgings

Forged in the late 1800s and early 1900s, these scissors can never be made again. Created from matrices no longer in existence, these carbon steel forgings were discovered in unfinished ("brute de forge") condition a decade ago by the widow of one of Nogent's finest scissor makers - an artisan who worked the craft of his father and grandfather for 76 years. Finished as a posthumous tribute to this master, each pair has been polished and sharpened to perfection in the "monte au moiré" tradition. Completed one at a time, the blades are plated with chrome, the handles with pure gold. Each pair bears the "69 Crown Medaille D'Or," a mark in continuous existence since 1693, denoting the highest quality in scissor craftsmanship. Protected by a hand-sewn cordovan leather case. Approximately 200 exist of each.


This particular pair doesn't have a number on them 
but they cut and feel as fine as the other sets


Small Trapizoidal Art Deco Pair


Larger Trapizoidal Art Deco Pair with Case


Rabbit

The Number 3 on Rabbit Scissors

Rabbit Scissors with Case
I could tell this pair had been
used whereas the other
three pairs seemed like they
had never been touched.


Close up of Crown Stamp on Case
69
Medeille D'Or 
FRANCE 

I am doing this post, so if anyone knows more about these types of Scissors, could you let me know what you know. Mainly I am just curious. I am a seamstress and I also make quilts. These scissors came to a good home and are most appreciated.

Happy Sewing
Melissa Abbott


Friday, April 5, 2013

Butterfly Table Runner Photos to Match Place Mat Project


I made three butterfly squares from a pattern in the book "Picture Piecing" by Cynthia English


I used leftover material from my Ocean Themed placemat project:


The Placemats I was looking to match 
with the Butterfly Runner

This is a photo of the paperless Piecing Method used to make the butterflies
Details of method and Cynthia English books at: http://www.englanddesign.com


Basically I surrounded each butterfly with 1 inch strips of fabric and then sewed the background fabric around it using 2 inch strips around the edge and 4.5 inch strips between the butterflies. I sandwiched in a batting and backed with a pretty coordinating blue batik fabric. Then I stitched in the ditch around the butterfly squares to hold everything together.

I hope this project was inspiring to you!
Happy Quilting,
Melissa


Thursday, April 4, 2013

Mermaid Puzzle Piece Art Quilt

Finished Quilt
Draw a quick outline of image
from Google Images
Google Images of Mermaids


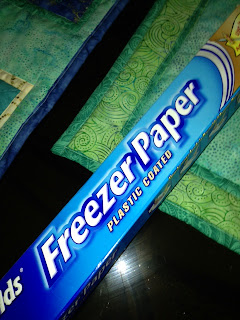
The first thing I did was research some images on Google of Mermaids. All I did was put the word mermaids in the Google search engine and then click the "images" button. A bunch of images will come up and you can scroll through and see which ones you like. I did a series of line drawings in my sketch book. Very simple, very quick. Then draw the image on Freezer paper. Cut out the image you drew on the Freezer Paper. Then press shiny side down onto fabric choices. 


Cut out fabric and then adhere each image to Steam a Seam. The Steam A Seam is a two step process where you firstly adhere it to the cloth and cut out the shape and then iron down the shape on to a permanent backing with a hot iron. Basically you are taking a simple line drawing and breaking down the shapes in it into various pieces of cloth and then reassembling back into a "puzzle" to create the shapes in the quilt.


Take each piece of the Puzzle and put them together on a single piece of cloth, then Iron down so it permanently is adhered to the backing cloth. Some people use a stabilizer but I just used some white cotton backing cloth that was fairly stiff.


After I ironed on all my "Puzzle Pieces" to the backing cloth, the Mermaid looked like this. I added some circle motif at strategic design locations for added interest.

This is before I zigzagged around the 
edges of the Puzzle Pieces


I added a backing and quilting layer sandwich before I Zig Zagged around the edges of all my Puzzle Pieces and then added some border too!!


Zig Zagging AWAY!!
This is the quilt finished with completed borders. 
I then added some sparkle jewels with some E-6000 glue and a toothpick 


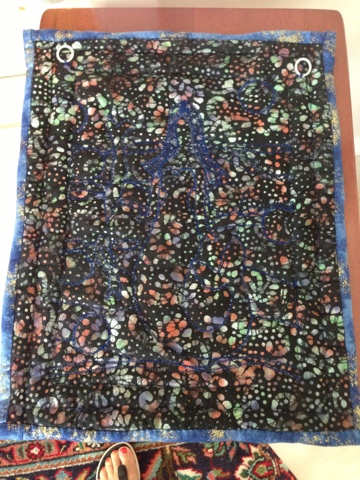
I sewed on a couple of plastic rings on the backing of the quilt, to hang it on the wall. I know you can sew in a sleeve too.


Backing of quilt

Finished Quilt with Jewels

I hope you enjoyed my overview of making a Puzzle Quilt!!
Happy Quilting,
Melissa Abbott